FOUNDATION PANEL
Well, as I promised, here is my version of a Cathederal Window Quilt tutorial. This is the first of two parts. It is very picture heavy so it may take a while to load. My photos are the best my cheap little camera would allow me, but I think with the text below each photograph, you should be able to get the general drift.

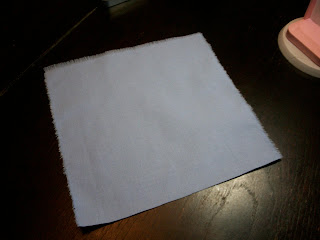
1) I began with about a metre of heavy sheeting. It had been sitting around in my stash for several years, and I had used bits and pieces of it over the years for various things. Unbleached calico (muslin), that has been washed of all sizing is just as good, or any other medium weight cotton fabric. I have also ironed this piece so that it is as square as I can make it.
2) The sheeting had no selvedge, so I had to find a straight edge by removing threads and going from there. Along the straight edge I found, I made four 23cm (about 9 inch) cuts, and then tore the fabric into four even lengths.
3) Removing the threads that came out, brought the width to 22.5cm and along one edge, I again made four nine inch cuts and tore through, yielding sixteen squares of 22.5cm (this is just under the 9 inches) each.
4) Each square is folded in halves and the two short edges are then sewn together. I did a few reverse stitches at the beginning and end to make sure the stitching stayed in place.
5) Snip off the corners.
6) Take the squares to the ironing board and press the seams open. Here you can see I have used a sleeve board and my dear little clover iron. Let me assure you, you do not necessarily need a dear little clover iron, but it sure does make it easier. If you are using a full iron, just use the very point to open as much of the seam as possible. You will see why in the next picture.
7) Pin the two raw edges together making sure to keep the pressed open seams flat and matched as exactly as possible. Pin one end flat and use another pin about 4-5cms (1 1/2 to 2 ins) from the other end. This end is going to be left open, for turning. The pin is just a marker.
8) Again I reverse stitched both ends of the stitching to reinforce the stitching. This will be very necessary to keep the stitches from coming out when turning.
9) You should now have a square that looks much like this.
10) Cut off the corner of the closed end of the seam.
11) Finger press open, and then iron the whole thing flat. It is really imporant that these seams are very flat, as when you turn them, they need to remain flat inside the square.
12) Fiddle inside with a finger and outside with your thumb until you have the diagonally opposite corner to the opening. Push the corner through the opening and carefully pull through.
13) Again fiddle with a finger inside the opening to ensure the seams are sitting flatly and again iron the entire square.

14) Now fold each of the corners in to the centre and pin. These are the basis of the frames that are the hallmark of the Cathederal Windows.
15) Use a straight stitch and sew first down the entire centre of the square one way, turn it 90 degrees and sew the other centre, to form a cross.

16) A group of four completed squares. You can see how they will go together to form the frames.

17) Using a zigzag stitch, join the two squares together through a frame. If you find sewing like this awkward, you might like to tack them onto a piece of non iron, non woven interfacing. This will help stabilize the sewing. You can either leave it on afterwards or snip it off.

18) The four strips of four squares awaiting final joining.

19) In the end, I decided against zigzaging the panels together and used hand stitch, in this case I used ladder stitch. It is a bit labour intensive, but I like the result it yielded. It really doesn't matter as in the end you can't really see any of the stitching. So use whatever is easiest for you.

20) A closeup of the final panel. YOu can see the frames all ready to receive the pieces.

21) I am using two panels for a frame to demonstrate how the fabric squares are sewn to the
frame.

22) Measure the outside of the frame (in this case it was 7 x 7 cms) and cut the square about 0.5cm less. (i.e. 6.5 x 6.5 cms).

23) Pin the frame around the patch of fabric, as shown.

24) I use blind hem stitch, which is a little like ladder stitch to hook the patch to the frame.

25) And here is the finished patch.
You can see that it is really quite simple to do, and using a sewing machine for much of the foundation work means that you can get through it faster than by hand. For the slow cloth purist you can sew it all by hand. I did when I first started making these. However, for making a full size quilt, when all of the patches must be done by hand, making the foundation by machine helps speed things along, and it is neat and tidy.
Hope you have enjoyed this, my first tutorial. Some parts were delayed because of my being sick. Later when I have finished the panel, I will photograph it and put it onto the blog.
cheers.


.jpg)