I have been thinking for a while that I would like to share the links of some of my RSS feed for crafts. These are the ones I like best, besides Sharonb's which I have already listed.
The first is for Annette Husband a gifted artist who lives at Humpty Doo in the Northern Territory. I have admired her work ever since I saw an article on her in Rubber Gazette, a now not published publication that I really loved. I met her through the After Midnight Stampers on yahoo groups. Her work is really amazing and she is so smart, too. She has some good video demonstrations on her blog.
The next one is another After Midnighter, Jen Lowe. She has a delightful blog. She is such a happy person, and shares her art with her mother who is in a nursing home. Just go and be made happy by this lovely lady.
Finally, Michelle Zindorf's blog is page after page of tutorials for stamping, mostly cards. The pictures she creates are just amazing and so simple to do. She is very thorough with her techniques and pictures are clear. Her instructions are so simple, even children can do them.
Later I will add some more URL's that you will enjoy.
bye for now ...

Monday, August 18, 2008
Sunday, July 6, 2008
Cathederal Window Quilt
FOUNDATION PANEL
Well, as I promised, here is my version of a Cathederal Window Quilt tutorial. This is the first of two parts. It is very picture heavy so it may take a while to load. My photos are the best my cheap little camera would allow me, but I think with the text below each photograph, you should be able to get the general drift.
Well, as I promised, here is my version of a Cathederal Window Quilt tutorial. This is the first of two parts. It is very picture heavy so it may take a while to load. My photos are the best my cheap little camera would allow me, but I think with the text below each photograph, you should be able to get the general drift.
 1) I began with about a metre of heavy sheeting. It had been sitting around in my stash for several years, and I had used bits and pieces of it over the years for various things. Unbleached calico (muslin), that has been washed of all sizing is just as good, or any other medium weight cotton fabric. I have also ironed this piece so that it is as square as I can make it.
2) The sheeting had no selvedge, so I had to find a straight edge by removing threads and going from there. Along the straight edge I found, I made four 23cm (about 9 inch) cuts, and then tore the fabric into four even lengths.

3) Removing the threads that came out, brought the width to 22.5cm and along one edge, I again made four nine inch cuts and tore through, yielding sixteen squares of 22.5cm (this is just under the 9 inches) each.

4) Each square is folded in halves and the two short edges are then sewn together. I did a few reverse stitches at the beginning and end to make sure the stitching stayed in place.

5) Snip off the corners.

6) Take the squares to the ironing board and press the seams open. Here you can see I have used a sleeve board and my dear little clover iron. Let me assure you, you do not necessarily need a dear little clover iron, but it sure does make it easier. If you are using a full iron, just use the very point to open as much of the seam as possible. You will see why in the next picture.

7) Pin the two raw edges together making sure to keep the pressed open seams flat and matched as exactly as possible. Pin one end flat and use another pin about 4-5cms (1 1/2 to 2 ins) from the other end. This end is going to be left open, for turning. The pin is just a marker.

8) Again I reverse stitched both ends of the stitching to reinforce the stitching. This will be very necessary to keep the stitches from coming out when turning.

9) You should now have a square that looks much like this.

10) Cut off the corner of the closed end of the seam.

11) Finger press open, and then iron the whole thing flat. It is really imporant that these seams are very flat, as when you turn them, they need to remain flat inside the square.

12) Fiddle inside with a finger and outside with your thumb until you have the diagonally opposite corner to the opening. Push the corner through the opening and carefully pull through.

13) Again fiddle with a finger inside the opening to ensure the seams are sitting flatly and again iron the entire square.

14) Now fold each of the corners in to the centre and pin. These are the basis of the frames that are the hallmark of the Cathederal Windows.

15) Use a straight stitch and sew first down the entire centre of the square one way, turn it 90 degrees and sew the other centre, to form a cross.

16) A group of four completed squares. You can see how they will go together to form the frames.

17) Using a zigzag stitch, join the two squares together through a frame. If you find sewing like this awkward, you might like to tack them onto a piece of non iron, non woven interfacing. This will help stabilize the sewing. You can either leave it on afterwards or snip it off.

18) The four strips of four squares awaiting final joining.

19) In the end, I decided against zigzaging the panels together and used hand stitch, in this case I used ladder stitch. It is a bit labour intensive, but I like the result it yielded. It really doesn't matter as in the end you can't really see any of the stitching. So use whatever is easiest for you.

20) A closeup of the final panel. YOu can see the frames all ready to receive the pieces.
19) In the end, I decided against zigzaging the panels together and used hand stitch, in this case I used ladder stitch. It is a bit labour intensive, but I like the result it yielded. It really doesn't matter as in the end you can't really see any of the stitching. So use whatever is easiest for you.
20) A closeup of the final panel. YOu can see the frames all ready to receive the pieces.

21) I am using two panels for a frame to demonstrate how the fabric squares are sewn to the
frame.

22) Measure the outside of the frame (in this case it was 7 x 7 cms) and cut the square about 0.5cm less. (i.e. 6.5 x 6.5 cms).

23) Pin the frame around the patch of fabric, as shown.

24) I use blind hem stitch, which is a little like ladder stitch to hook the patch to the frame.

25) And here is the finished patch.
You can see that it is really quite simple to do, and using a sewing machine for much of the foundation work means that you can get through it faster than by hand. For the slow cloth purist you can sew it all by hand. I did when I first started making these. However, for making a full size quilt, when all of the patches must be done by hand, making the foundation by machine helps speed things along, and it is neat and tidy.
Hope you have enjoyed this, my first tutorial. Some parts were delayed because of my being sick. Later when I have finished the panel, I will photograph it and put it onto the blog.
cheers.
Tuesday, July 1, 2008
Towards a brighter tomorrow ..
Well, the weekend, anyhow. I have been busy making a Cathedral Window Quilt and have documented it in the form of a tutorial. I shall edit the photographs, work on the text part and post it for you to see on the weekend. I would do it sooner, but I have to earn a living three days a week. Also, I have not looked at the photographs on a computer yet to see if they are going to be suitable and may have to go back over some areas if they are not clear.
I hope it will give you all something to look forward to, and enjoy, as much as I have enjoyed doing it.
Till then ...
I hope it will give you all something to look forward to, and enjoy, as much as I have enjoyed doing it.
Till then ...
Sunday, June 15, 2008
To be. Or. Not...
Okay, so Paula Hewitt at The Beauty of Life wrote about her thoughts on the debate between "craft" and "art". Sharonb (see sidebar) also weighed in with her comment. So here is what I think.
People who call their work "art" often think they are different because they went to "Art School" or something and studied some sort of Art. Technically, for this to be so, their work should be peer reviewed - which mostly it is not. Their "Art" is not different to those of us who "craft".
"Craft" too, used to be what more skilled workers did, and belonged to guilds and had apprentices. Such as masons, carpenters and such. Nowadays these people are referred to as "blue collar workers" and frowned down upon by the "white collar workers". "Art" was usually limited to "painting", and included Leonardo da Vinci, Michelangelo, Renoir and Monet.
But now, anything goes, and craft and art are much the same thing. Often it is producing something to justify the huge expense of buying all those "artistic" goodies and stash. So unless you are going to differentiate with guilds and apprentices, you really are just another person with alot of expensive "artistic" goodies and a stash you have to reduce.
Unless you are peer reviewed, you artistic status is much the same as mine, and mine is that of a learner, or maybe "journeyman".
Galleries that wish to differentiate are also going to find themselves going out of business. So much is available on line and so much of it commented on by the "hoi poloi" that trying to have a gallery that is not commented on somewhere in the blogsphere is just not possible. People need to be able to interact with art, whether it is on gallery walls, on their own private walls or on the internet. If they cannot interact with art they are going to let you know about it in no uncertain terms.
It is not much different to the debate going on in the world of music these days. With so much music available on line, many music houses either have to adapt or fail. There are those who are trying to hold out for "the noble cause" but cannot understand why people are not flocking to them and their coffers are empty.
Art and music have become "common". They are not there just for the elite select few, they are there for everyone. The "hoi poloi" understand art just as well as the elite, select few. Just because they are not "megarich" and overeducated, does not mean they do not have an opinion, nor are they incapable of "truly appreciating" the subtleties of nuances within art or music.
Thus saith the hoi poloi ...
Monday, June 9, 2008
A bit of catching up ...
Because of my big cleanup, I have not been making things. I have not go anything to show you. But I have joined a social network for Stitchers, called Stitchin fingers. It is run by Sharonb, who I have talked about in earlier posts. I was going to do her Take it Further Challenge. These people are way too advanced for me. But in the group there are a cross section of stitchers, from beginners through to advanced. It is a lovely hub, and I hope to learn more, and contribute a little.
So when I have finished my cleaning up, hopefully today, I have some work to do. I am hoping that today will be the day I can take my machine to the shop for servicing, or if it is tomorrow, I can give it to DD for her to give to them.
Now that I have some really good storage for my crafts, and will get one for my sewing as well this week, I think I can be a bit more organised. Hopefully this will produce Art. The storage is really large boxes that slide into metal shelves, so most of it would be okay to just tape up for travel. A few things I would like to store more securely for travel, like my laminator, my clover iron, heat embosser and melt pot. They have electrical parts and I don't want to risk them breaking by being thrown around by careless removalists. Nothing like some tension sheet. (You know, bubble sheet that you get at the post office - on Red Dwarf it is called Tension Sheet - lol).
Then maybe I can vamp up and ramp up this blog to be something.
... never know your luck in a big city, as the X used to say ...
Monday, May 26, 2008
Star Book take 2 ...
Well, whaddya know? I no sooner post my Star Book photos and TV Weekly are giving out the instructions. I made my book in 2006, and there you go. It looks much the same. I will have to go check out what sort of glue she is using to make it.
What I like about the TV Weekly is that it is video based, they make it interesting and show you how to do it. I have done a few things from their shows. Very slick and professional.
cheers ...
What I like about the TV Weekly is that it is video based, they make it interesting and show you how to do it. I have done a few things from their shows. Very slick and professional.
cheers ...
Sunday, May 25, 2008
Star Book ...
I love making books. Books that are glued or books that are sewn or books that are a combination of both. I also like folded books, such as a maze book or concertina book. Today I am going to show you my Star Book.

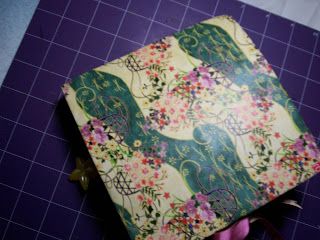
Okay, this is the cover. The paper was downloaded from the Canon site and was just so pretty.
 The handsewn spine. I just used crochet cotton; but I used a cradle to mark all the holes. I have seen these made with a Zutter punch and wire spine, but it didn't look as good as the effect you get from handsewing.

Okay, this is the cover. The paper was downloaded from the Canon site and was just so pretty.
The handsewn spine. I just used crochet cotton; but I used a cradle to mark all the holes. I have seen these made with a Zutter punch and wire spine, but it didn't look as good as the effect you get from handsewing.The first open pages. The picture on the blue square is a gold stamp image.

Here I have cut out a frame on the left hand side and inserted a photograph. On the right hand are two tiny frames that have floral stickers to add a little focus. (Sorry the camera strap dropped down).

This is the tiled page stamped with my dragonfly art stamp and embossed. Opposite is an acrylic pocket with a tag. The tag top has beads and embellishments tied to it.


 This is the last page. The tied thing on the back cover is a mini book. It has pages, but nothing in it just yet. I still have one or two small things to do to the book.
I think everyone should try at least one. This was the second one I made. The only problem I have had with it, is that the glue between the pages doesn't hold too well. It is quite heavy and I think this may be the cause. I will keep experimenting.
adieu ...
Saturday, March 22, 2008
Adhesives, glue and other sticky stuff ...
As a horselover as a child, certain adults thought it would be helpful to inform me that dead horses got sent to the glue factory. The upshot of this was when I was starting school, when we had to glue and paste, I would become distraught at the sight of the Clag bottle and immediately burst into tears. My teacher would make up flour and water paste for me to use instead. It wasn't till I was in my teens that I found out this little myth was just adult humour.
I will not use this space here to discuss the rendering of animal parts into glue. In fact these days, I am not sure those of us in the West use rendered animal parts as glue, but use a petro chemical by product or something.
My first choice in adhesives are double sided cassette tapes. These are usually well made and not overly expensive and by and large do the job required. If I need something stronger, I use a clear liquid glue. Other adhesives I like are my sticker machines which are also fun.
I do not like stick glues. Stick glues always dry out and do not adhere after a period of time, usually less that a year. I have used several different brands and have found this to be true of all of them. I like the idea of a stick glue, and they are certainly the most inexpensive, but their longevity is not the best. When I want something stuck, unless I use repositionable tape, then I want it stuck forever.
When cutting an item that has been glued or even a glue tape with a removeable backing, first coat your scissors with versamark liquid from a stamp pad or pen. The versamark is easily removed later by wiping with a baby wipe.
I am sceptical about the "acid free" status of glues. What would be in a glue that made it acidic in the first place?
Will update soon ...
Friday, March 7, 2008
Taking the time ...
When you see something like the Wedding Album below, or other finished pieces of work, you have to realise that there has been much time spent in doing the item. I am talking years. You cannot just sit down one morning and say "I am going to make xxx". I cannot make a saddle, nor for that matter a bridle - I understand the concepts behind making them and as a horselover I would love to be able to - but apart from not having the tools to do so, I do not have the skills either. And it is the gaining of the skills in the first place that you require in order to make anything worthwhile.
The Album came about because I spent almost one or two nights per week for a year going to classes at a scrapbook shop learning the basics. I have books and magazines that I have used articles from, to experiment with various products to suppliment what I learnt at the scrapbooking shop. I have taken the money and invested it in the finest tools so that I have both the tools and skill to do this. But having said that, one of the skills that an artist has to have is a sense of colour.
When I first came up with the idea of the Album, knowing Kylie's dress was going to be blue, I had thought of matching the colour and using plain blue paper and stamping it and embellishing it in other ways, but still with the pieces torn and placed on each side of the pages. It was my daughter (who has also done much as I have with scrapbooking and paper arts) who suggested the yellow for the matting. Again it too is a different yellow from the frangipani flower centres too. But these colours work. They work because they are a whole. They go with the pictures, they are very modern and they are very beautiful. They are whole.
Each page is made from a single piece of card stock, cut to 12 inches by 11 1/2 inches. The extra half inch on the edge of the page is for the binding combs. So each page had to be moved in by this half inch. The back of this half inch border is re-inforced by another strip of cardstock so that when the album is open, there is enough strength at the hole for it not to tear. So in effect what has happened is that I have designed the pages for 11 1/2 inches by 11 1/2 inches.
I took the time to have the pictures developed in a lab rather than print them out on photo stock paper myself. My printing skills in this area are not the best, and as I know this, to do the album justice, the extra money I spent doing this has resulted in beautiful pictures.
Overall, it has been a fairly expensive project - it was a gift to the bride as a wedding present. Kylie is a lovely lady and she has married her dream beau, I thought she deserved something special to remember her special day. I could offer to make this album because I knew I had the skills, knowledge and tools to do it justice. Serendipity helps too, because I was looking for other papers when I discovered those lovely papers that I ended up using.
Wednesday, February 27, 2008
Still here ...
I am still here. I have been trying to upload some photos that seem to not want uploading. I will look at them again on the weekend and see if I can figure what is wrong. I have some things to show you including my TIF piece. So if all goes well I will back on the weekend.
Monday, February 11, 2008
A little to share ...
Well, I did promise to share some photos of the Wedding Album I am making for the lady at work as her wedding gift. I am not the best photographer nor am I the best scrapbooker, but she is pleased with it. It is by no means finished. I put it together so that she could see the theme that I had used throughout.
I thought going off to Vanuatu to get married extremely romantic, so I have tried to keep the basic theme going. But I tried to keep in mind that they are a bit older couple who have been living together for a while and didn't want the expense or stress of a big wedding with a million guests.
I found the papers in my local scrapbook shop and the cardstock is Bazzil (?sp).
 A joint page. When you see the next picture, it demonstrates that the two individual photos open so that some journalling can be added.


The Wedding Ceremony page. I used stamps and cutouts to highlight it. The facing page also has the cutouts.

A dimensional paper frame for the Certificate.
 The inside back cover has a holder for the disc with all the photos on it. I used two punches to make the hearts and ran them through the sticker machine.
I thought going off to Vanuatu to get married extremely romantic, so I have tried to keep the basic theme going. But I tried to keep in mind that they are a bit older couple who have been living together for a while and didn't want the expense or stress of a big wedding with a million guests.
I found the papers in my local scrapbook shop and the cardstock is Bazzil (?sp).
 the Cover - a small metal frame with a cutsie dimensional sticker in it.

The first page - I laminated a little map I downloaded.

Detail of the cross stitch palm tree - the slippers were also cross stitched. There is another tree later in the Album as well.

His Page - it needs something
 Her Page - the shiny things are little rhinestones in a spiral with rays coming off them. I liked the effect it gave. But this also needs a little more.
A joint page. When you see the next picture, it demonstrates that the two individual photos open so that some journalling can be added.The Wedding Ceremony page. I used stamps and cutouts to highlight it. The facing page also has the cutouts.
A dimensional paper frame for the Certificate.
The inside back cover has a holder for the disc with all the photos on it. I used two punches to make the hearts and ran them through the sticker machine. There are 16 pages in all back and front. Each page was started with a 1.25cm (0.5") margin so that I could use the Bind-it-All. The covers are chipboard. I glued a thin strip of paper over each outer edge, the used a sheet of the paper as the cover. Inside I glued a sheet of the card stock. I am hoping to maybe make a box for it.
I am pleased with the colours. I wasn't sure when I first saw them but DD suggested using the creamy yellow matts and lettering which has set it off nicely. I think I will look around for some gold or copper coloured metal embellishments and see how they will look. I felt it best not to get too arty farty with it.
At least it isn't Cheech and Chong ...
Sunday, February 3, 2008
Good news, bad news ....
The good news is that the lady for whom I did the Wedding Album for was very pleased with it. Which is a great relief. So now I can finish it off, over the next few weeks. I have some photos.
The bad news is that due to the weather being inclement, I have not been able to blog at all because my laptop will not pick up a signal and DD has had to use hers so the GS's can use the X-box while the weather is bad.
So next weekend will have to be it.
The bad news is that due to the weather being inclement, I have not been able to blog at all because my laptop will not pick up a signal and DD has had to use hers so the GS's can use the X-box while the weather is bad.
So next weekend will have to be it.
Wednesday, January 30, 2008
Uh-Oh
I am in trouble now. I haven't finished my challenge piece for this month and a new one is due on Friday. Could this have something to do with getting my head around the concept of "Organisation"? Well, partly. But mostly I put a marathon effort into finishing off the Wedding Album I have been doing for the lady at work. Once DH finishes watching his DVD I will set his chair up to take the photographs. I want to give it to her at work tomorrow.
And I have been doing it the slow way, I hand stamped every page and embossed the stampings. I made paper flowers by hand rather than purchase ready made ones. Because I have used binding for the spine, I reinforced every page, meaning that I had to move everything over enough to allow for the reinforcing cardstock as I put it on last. There is much "Slow Cloth" concept in the album and I am very proud of that. When I put up the pictures on the weekend you will see what I mean.
I don't feel it is finished, either, but I want to show it to her, incase she doesn't like what I have done.
So I will put in a marathon effort on the weekend to finish the challenge piece and begin to journal ideas for the next challenge. Maybe I should offer to photograph and post the journalings, because then I will have to do it to put up.
see you soon ...
Monday, January 14, 2008
Blue and Green
I am going to place some pictures here of some weedy vine growing at the back of our place.


The area is rough: we haven't had horses down there for months, since the young colt died.
I can still hardly bring myself to go down there, because I expect him to come running up wanting to know what is going on.
I can still hardly bring myself to go down there, because I expect him to come running up wanting to know what is going on.
I am putting them up, however, because of the beautiful colour contrasts. It is quite an overcast day today, but the colours are still vibrant. I would love to capture these colours in some way, and maybe during the year I will be able to. Still I thought anyone looking might enjoy them as well.
I think they are some sort of morning glory. They have little yellowy things in the middle that have the pollen stuff. (I did say I don't know much about flowers).


The rather amusing thing about this vine is that it is smothering the lantana, which is also considered a weed in this country. However, the really sad thing is that it is also strangling many native trees growing in the bushland area next door. The owners are a Government Department who unfortunately do not seem to care one little bit about the trees, the bush or any of the native (an unnative) animals that reside there. Even the "conservationists" do not care and that is really, really bad. I guess it is out of the way and not a stage for their egos. If we went in there, we risk being charged with trespassing. The maniacs on their motorbikes do not ever get charged but we have been warned.
The bath is a water tub for the horses, and always has a little water in it for the birds and a rock so they don't drown. We have never used the hitching posts. If the horses use, them it is for a good scratch, but now it is a little low for the mare and just something to walk around.
Sunday, January 13, 2008
Backside
I have been thinking about this for a while now. No one else seems to have written much about it that I can see. However, I consider it is an important aspect of working in all needlearts.
I suppose older, more experienced needle artists do not think too much about it, but the newbies and even intermediate stitchers need a bit of a primer on the back of their work.
Why is the back so important? The back is important because if it is too lumpy and messy, it will show through to the right side of the work as unsightly lumps and bumps, it will feel harsh to the hand and give the appearance of lack of knowledge or care in execution.
I guess in a way, taking care of the backside of your work is also part of the slow cloth concept.
People often comment to me on how tidy the back of my cross stitching is. This is because I use a loop start stitch so only the tails are threaded under stitches when finishing. My work lies flat. Also I do not cross over rows at the back, either, so nothing shows through the holes when viewed from the front. It has taken me an age to learn to do this, but it has made such a difference to my work.
If I made you a garment, say for example a jacket, but I did not finish the seams, did not line it or press it as I went along, it would not be very beautiful nor would it look good when worn. However, spending the time to finish the inside seams, press all the seams open or in one direction, lining and even handsewing where needed, although you cannot see these things from the outside, would make such a difference to the appearance of the garment and how it felt to wear.
If, like me in the needlearts, you are self taught, it is worth investing in a few "how-to" books and taking the time to learn to finish the backside of your work so that the front is beautiful.
Taking the time to learn how to finish stitches on the back so that the work is flat is necessary. Learn how to finish without knots; press your work from the back, using a towel when raised surface embellishments have been added. If necessary, prepare your fabric with the use of a tear or wash away backing, so that the front surface does not pucker. Spend the time on preparation to have a good backside and it will lift your front side to a much greater level. You will notice the difference yourself, and people who look at your work will notice the difference.
Time is of the essence ...
Tuesday, January 8, 2008
I forgot ....
In my rush to load up for my TIF challenge, I forgot another photograph that I had taken.
I downloaded the colour swatch of the challenge and went in search of the embroidery threads. If I get some time I might try them together with some cross stitches or French knots. Anyhow, I referred to the website Sharon had said offered the DMC numbers and wrote them down. But as I had printed it off as well, I compared to my own threads, and sure enough I had some of them already. But, as you will see, I found a different number to the strange green colour:

I downloaded the colour swatch of the challenge and went in search of the embroidery threads. If I get some time I might try them together with some cross stitches or French knots. Anyhow, I referred to the website Sharon had said offered the DMC numbers and wrote them down. But as I had printed it off as well, I compared to my own threads, and sure enough I had some of them already. But, as you will see, I found a different number to the strange green colour:
The green I found is 522 (directly under the colour swatch) where the recommended colour was 3764. I am sorry to be a pedant about this, but I was just looking around for some rubber stamps when I thought I would look. The creamy yellow doesn't show well in the photo, and I think that is because of the overabundance of green.
I am off to the Scrapbook shop tomorrow to work on the Wedding Album and hope I will have some progress to report tomorrow night.
cya
Subscribe to:
Posts (Atom)