Earlier this year, my elderly father moved from Adelaide to Canberra, to be nearer to family. He has the family albums, so my Aunt, who remains in Adelaide did not have access to them any longer. As part of my "therapy" to overcome the major depression I had, my psychologist suggested that I take up a few projects. So I thought an album for my Aunt with pictures of my self, my two sisters and our respective families and grandchildren would be nice for her.
Above is the Cover of the album I made for her. I made if from a single fat quarter of fabric as the album is for 22cm x 22cm (8" x 8") pages. It is not overly large. The flower was originally a white fabric flower which I have coloured using my Versacolour mini and the red spots using Red Stazon after the yellow ink has dried.
I used a grommet (eyelet) in one corner (with my u-beaut cropadile) and threaded through for the tags. I like the effect without it being over arty farty.
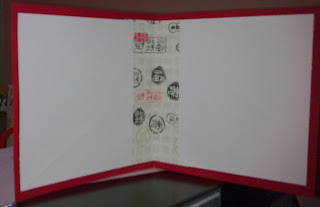
For the inside cover I have used a neutral cardstock, bookmaker's glue and all on a base of archival quality chipboard.

This is the side view to show you how 43 pages of scramping look. It took almost six weeks to complete. I have used "Wonder under" on the spine and ironed it to a same size piece of calico. This will give it expansion and make it last so much longer than a cardstock or paper one if you purchased a commercial album this size.
I will share some of the photos from the album to give you a feel for how the work was done and some of the detail that has gone into each page and it's opposite journal page.
ARTIST TRADING CARD:

This is the page of The Daughter and Grandsons 1 & 2. I wanted a sort of ATC feel to it. I printed off Lorum Ipsum in fancy but very tiny font, then applied four shades of brown ink around the edges with the Versacolor ink minis and then a final hop around with the black one. I have used a yin yang stamp for the circular drops attached to brown ribbon. The Eiffel tower was stamped and embossed. I cut round the top of the tower to slot in the photo behind it.
A few other stamps, were used to add a bit of abstract feel to it. I printed off the words onto some scrap cardstock and ran them through the Xyron sticker machine. There are a row of gold brads down the RH corner and along the bottom which were cut off in the photo.
The page opposite this one is rather a scaled down version, and instead of the picture I have journalled about the photograph and the people in it.
LIZARD LOVE:
LIZARD LOVE:

Grandson2 loves lizards, so it was only natural I did a page that had lizards on it. But putting it into perspective with the picture wasn't all that easy. This photograph makes it look as though there are several kinds of lavender but in fact the matt stock is bright pink - his favourite colour at the moment (don't ask - he wont say). Unlike most of the other pages for the journalling where I have made them just either the same as each other or reflection of each other, I have made this one a continuation picture.
I tore a sheet of printer paper to make the shape of the creek for the lizards, and using my Versacolor mini stamp pads applied various greens, then blues and brown and green again for the banks and creek. I then used blender pens (SU!) to blend the colours. I stamped on the dragonflies. Then used the white gel pen for the waves on the water. I used the thin end of double brush marker pens to make the grass. for the weeds I used a skinny plant stamp.
The trees in the back ground were stamped in green, then used a maroon pen to colour the trunks and branches. The lizards I had downloaded onto cardstock several years ago. I just cut them out and using foam dots to raise them made them look like they were drinking at the stream.
Below is a closer look at each side of the picture.


HER MAJESTY THE QUEEN OF SHEBA
This last page is for my Arabian mare, Stephanique. She is a dear old horse and I wanted somthing fitting for "the Queen of Sheba" (lol).

I used a background egyptian themed stamp I have had for a few years with Versamark. I stamped the versamark onto the page, then sprinkled clear embossing powder over it. Tapped it off and heat embossed it. I had to use the stamp four times around the page to cover it.
I then used the Versamark again for the Eye of Ra and the Ankh, then sprinkled on some hologram gold embossing powder. When heated, the hologram gold is really sparkly and looks like real gold. The three little date palms were stamped in back ink and clear powder used on them. One didn't take so well so I fixed it with a black marker. Shhh ...
So the entire album has gone along in this manner, using colours from the phot0graphs. Stamps and use of brads, stick on crystals, punches and so forth.
My Aunt was pretty happy with the album, so that made me extremely happy.