
Thursday, August 13, 2009

Friday, July 31, 2009
Updates
Monday, August 18, 2008
Sharing ...
The first is for Annette Husband a gifted artist who lives at Humpty Doo in the Northern Territory. I have admired her work ever since I saw an article on her in Rubber Gazette, a now not published publication that I really loved. I met her through the After Midnight Stampers on yahoo groups. Her work is really amazing and she is so smart, too. She has some good video demonstrations on her blog.
The next one is another After Midnighter, Jen Lowe. She has a delightful blog. She is such a happy person, and shares her art with her mother who is in a nursing home. Just go and be made happy by this lovely lady.
Finally, Michelle Zindorf's blog is page after page of tutorials for stamping, mostly cards. The pictures she creates are just amazing and so simple to do. She is very thorough with her techniques and pictures are clear. Her instructions are so simple, even children can do them.
Later I will add some more URL's that you will enjoy.
bye for now ...
Sunday, July 6, 2008
Cathederal Window Quilt
Well, as I promised, here is my version of a Cathederal Window Quilt tutorial. This is the first of two parts. It is very picture heavy so it may take a while to load. My photos are the best my cheap little camera would allow me, but I think with the text below each photograph, you should be able to get the general drift.
 1) I began with about a metre of heavy sheeting. It had been sitting around in my stash for several years, and I had used bits and pieces of it over the years for various things. Unbleached calico (muslin), that has been washed of all sizing is just as good, or any other medium weight cotton fabric. I have also ironed this piece so that it is as square as I can make it.
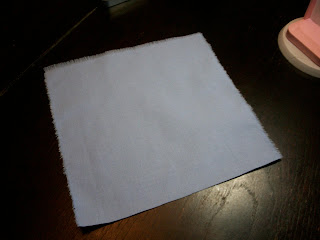


19) In the end, I decided against zigzaging the panels together and used hand stitch, in this case I used ladder stitch. It is a bit labour intensive, but I like the result it yielded. It really doesn't matter as in the end you can't really see any of the stitching. So use whatever is easiest for you.

20) A closeup of the final panel. YOu can see the frames all ready to receive the pieces.


22) Measure the outside of the frame (in this case it was 7 x 7 cms) and cut the square about 0.5cm less. (i.e. 6.5 x 6.5 cms).

23) Pin the frame around the patch of fabric, as shown.

24) I use blind hem stitch, which is a little like ladder stitch to hook the patch to the frame.

25) And here is the finished patch.
You can see that it is really quite simple to do, and using a sewing machine for much of the foundation work means that you can get through it faster than by hand. For the slow cloth purist you can sew it all by hand. I did when I first started making these. However, for making a full size quilt, when all of the patches must be done by hand, making the foundation by machine helps speed things along, and it is neat and tidy.
Hope you have enjoyed this, my first tutorial. Some parts were delayed because of my being sick. Later when I have finished the panel, I will photograph it and put it onto the blog.
cheers.
Tuesday, July 1, 2008
Towards a brighter tomorrow ..
I hope it will give you all something to look forward to, and enjoy, as much as I have enjoyed doing it.
Till then ...
Sunday, June 15, 2008
To be. Or. Not...
People who call their work "art" often think they are different because they went to "Art School" or something and studied some sort of Art. Technically, for this to be so, their work should be peer reviewed - which mostly it is not. Their "Art" is not different to those of us who "craft".
"Craft" too, used to be what more skilled workers did, and belonged to guilds and had apprentices. Such as masons, carpenters and such. Nowadays these people are referred to as "blue collar workers" and frowned down upon by the "white collar workers". "Art" was usually limited to "painting", and included Leonardo da Vinci, Michelangelo, Renoir and Monet.
But now, anything goes, and craft and art are much the same thing. Often it is producing something to justify the huge expense of buying all those "artistic" goodies and stash. So unless you are going to differentiate with guilds and apprentices, you really are just another person with alot of expensive "artistic" goodies and a stash you have to reduce.
Unless you are peer reviewed, you artistic status is much the same as mine, and mine is that of a learner, or maybe "journeyman".
Galleries that wish to differentiate are also going to find themselves going out of business. So much is available on line and so much of it commented on by the "hoi poloi" that trying to have a gallery that is not commented on somewhere in the blogsphere is just not possible. People need to be able to interact with art, whether it is on gallery walls, on their own private walls or on the internet. If they cannot interact with art they are going to let you know about it in no uncertain terms.
It is not much different to the debate going on in the world of music these days. With so much music available on line, many music houses either have to adapt or fail. There are those who are trying to hold out for "the noble cause" but cannot understand why people are not flocking to them and their coffers are empty.
Art and music have become "common". They are not there just for the elite select few, they are there for everyone. The "hoi poloi" understand art just as well as the elite, select few. Just because they are not "megarich" and overeducated, does not mean they do not have an opinion, nor are they incapable of "truly appreciating" the subtleties of nuances within art or music.
Thus saith the hoi poloi ...
Monday, June 9, 2008
A bit of catching up ...
So when I have finished my cleaning up, hopefully today, I have some work to do. I am hoping that today will be the day I can take my machine to the shop for servicing, or if it is tomorrow, I can give it to DD for her to give to them.
Now that I have some really good storage for my crafts, and will get one for my sewing as well this week, I think I can be a bit more organised. Hopefully this will produce Art. The storage is really large boxes that slide into metal shelves, so most of it would be okay to just tape up for travel. A few things I would like to store more securely for travel, like my laminator, my clover iron, heat embosser and melt pot. They have electrical parts and I don't want to risk them breaking by being thrown around by careless removalists. Nothing like some tension sheet. (You know, bubble sheet that you get at the post office - on Red Dwarf it is called Tension Sheet - lol).
Then maybe I can vamp up and ramp up this blog to be something.
... never know your luck in a big city, as the X used to say ...